
Guide: Phone Number Normalization & SHA256 Hashing for GTM Server-Side
Phone NormalizerPhone HashingStandard Format
This variable template normalize & hash any phone/mobile number with SHA256 after formatting the value to the desired format. i.e. removing leading zero, plus sign, dashes, brackets, white spaces.
Overview
The Phone/Mobile Normalizer & SHA256 Hasher is a high-performance utility for Google Tag Manager Server-Side. Its primary purpose is to sanitize “messy” user-inputted phone numbers and transform them into a standardized, privacy-compliant SHA256 hash.
Configuration Checklist Explained
Each configuration setting in the Phone/Mobile Normalizer SHA256 Hasher variable allow you to clean the phone data so it matches the strict formatting required by advertising and analytics platforms.
Prerequisites & Permissions
Before installation, ensure your GTM environment and user access levels meet the following requirements:
Container Type
- GTM Server-Side Only: This variable uses the
sha256SyncAPI, which is exclusive to Server containers. It will not function in a Client-Side GTM container. - You can check it on your account’s container type or on admin tab container settings Target platform.
User Access Levels
- To use and install the templates, you must at least has Editor or Edit permission.
Installation & Configuration
Step 1 : Import the Variable Template
This step installs the specific logic required to clean and secure phone numbers, as standard GTM variables do not have the built-in capability to perform complex normalization or SHA256 hashing natively.
In the GTM Container sidebar, click on the Templates tab.
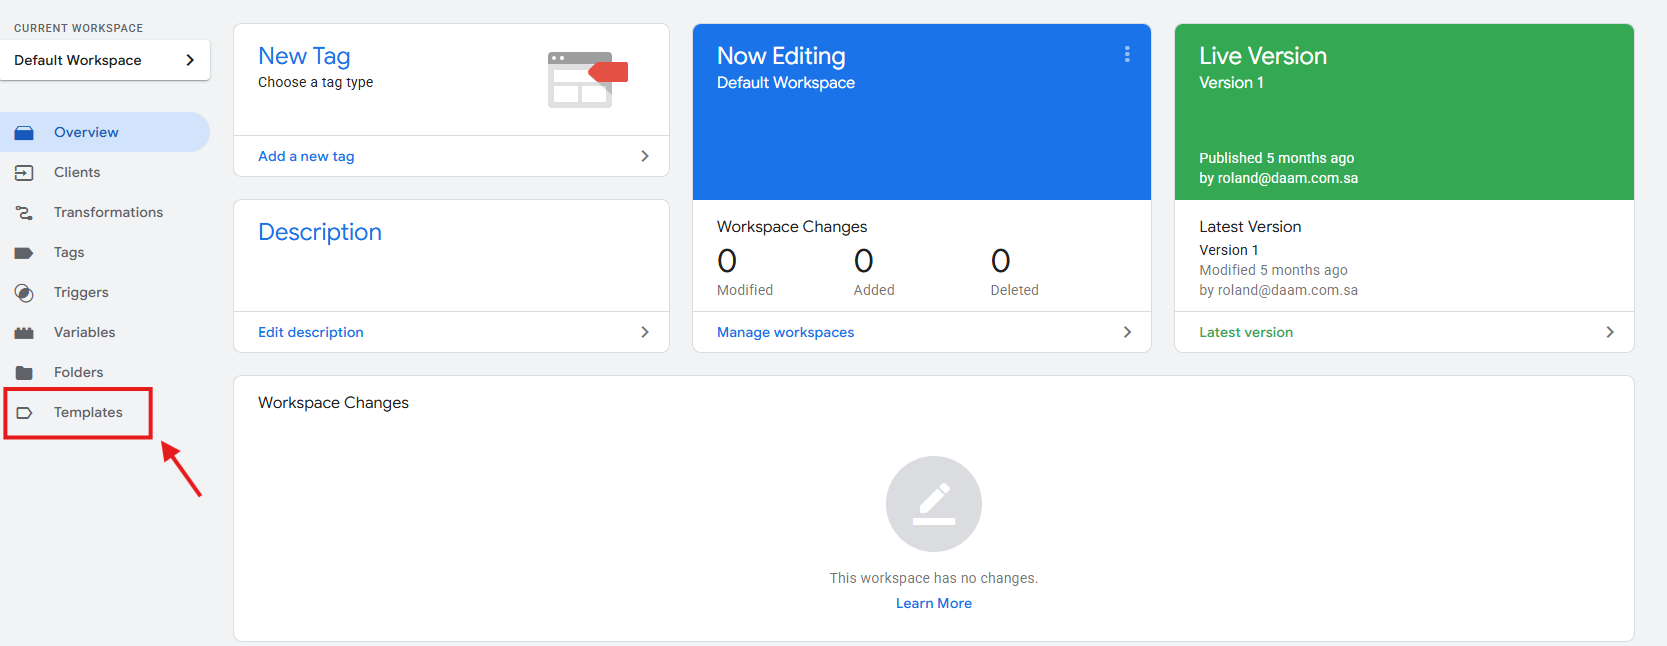
Locate the Variable Templates section and click Search Gallery.

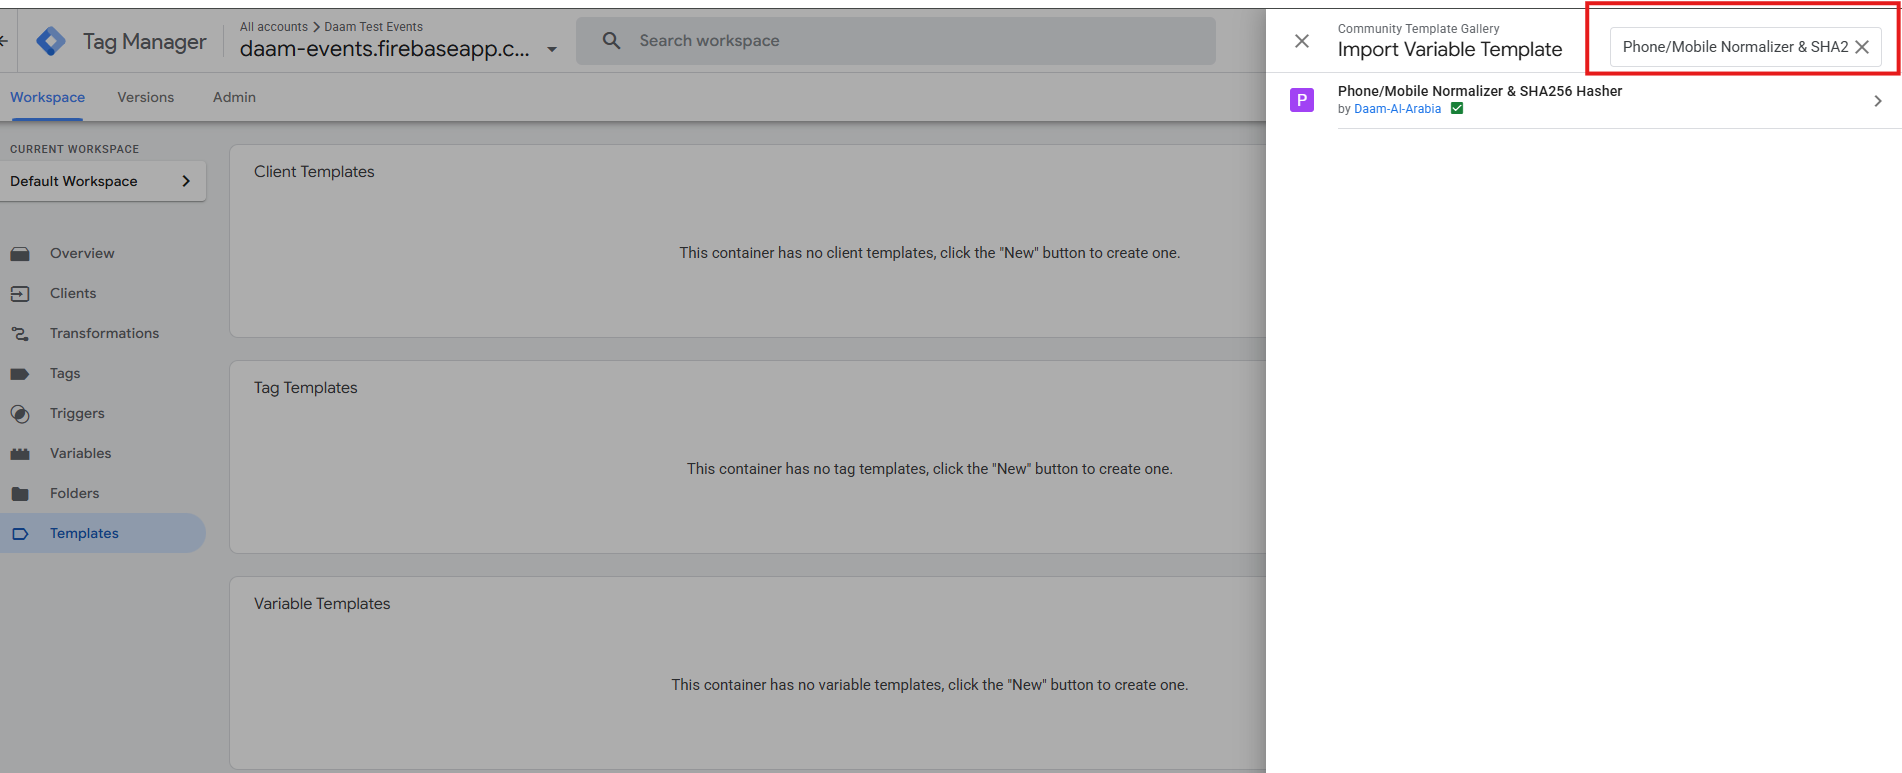
Search for “Phone/Mobile Normalizer & SHA256 Hasher” by Daam Al-Arabia and select Add to Workspace to enable the template for use.
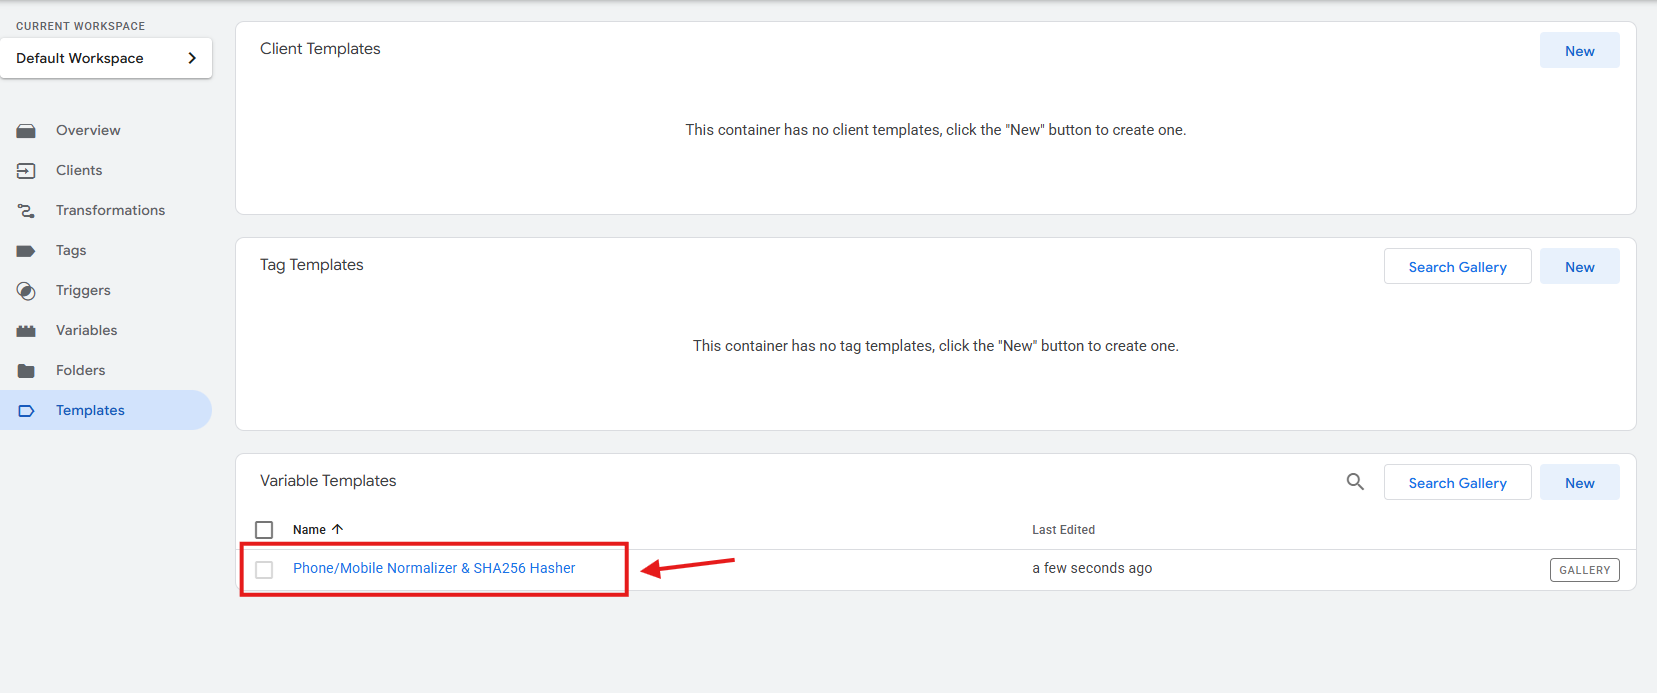
New template now active. You will see template added alert and Phone/Mobile Normalizer & SHA256 Hasher has been added to the variable template list.
Step 2: Configure the Normalization Settings
This step defines a specific “source” for the raw phone number within your server’s incoming data, ensuring the normalizer has a clear and consistent input to process.
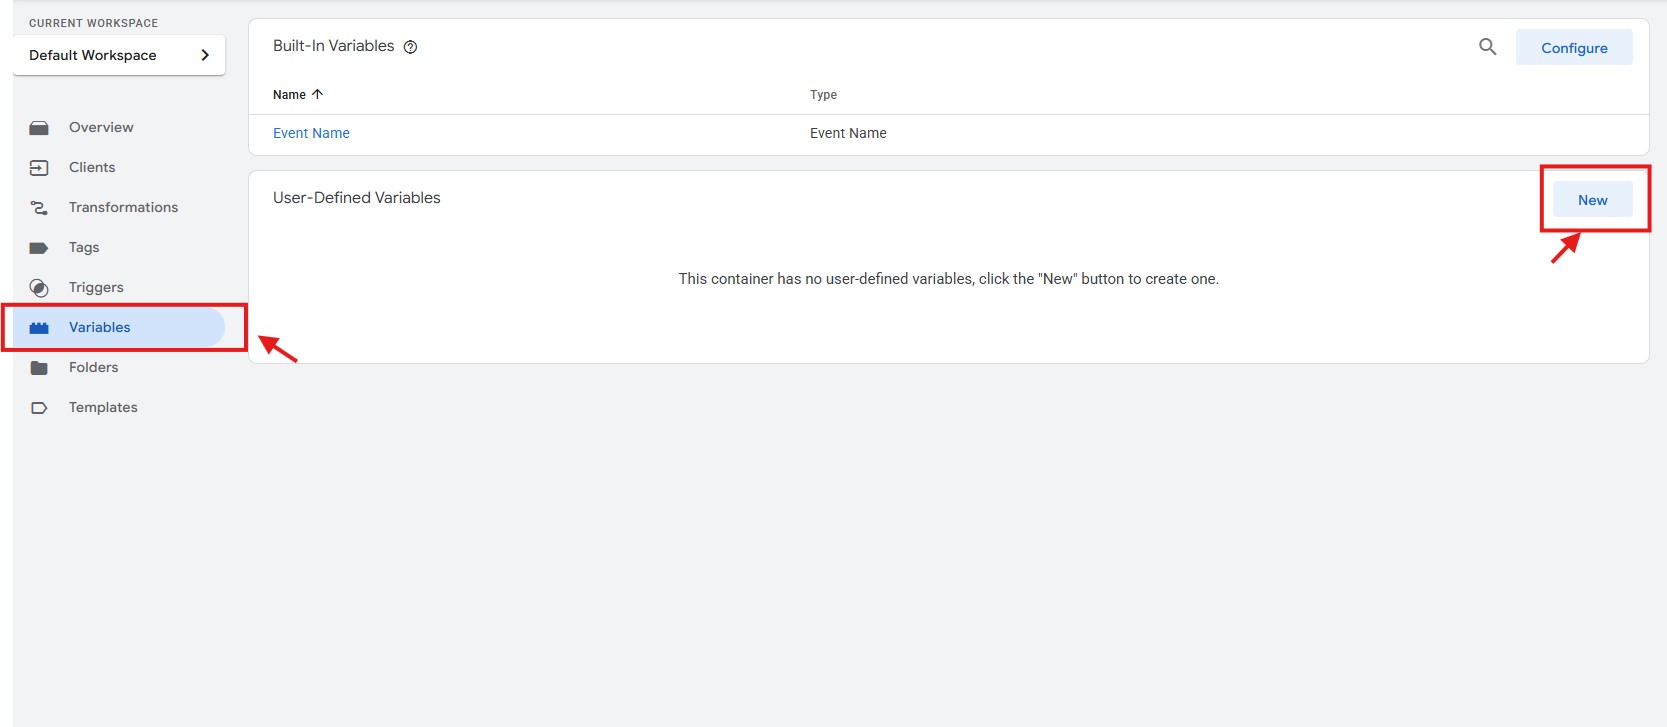
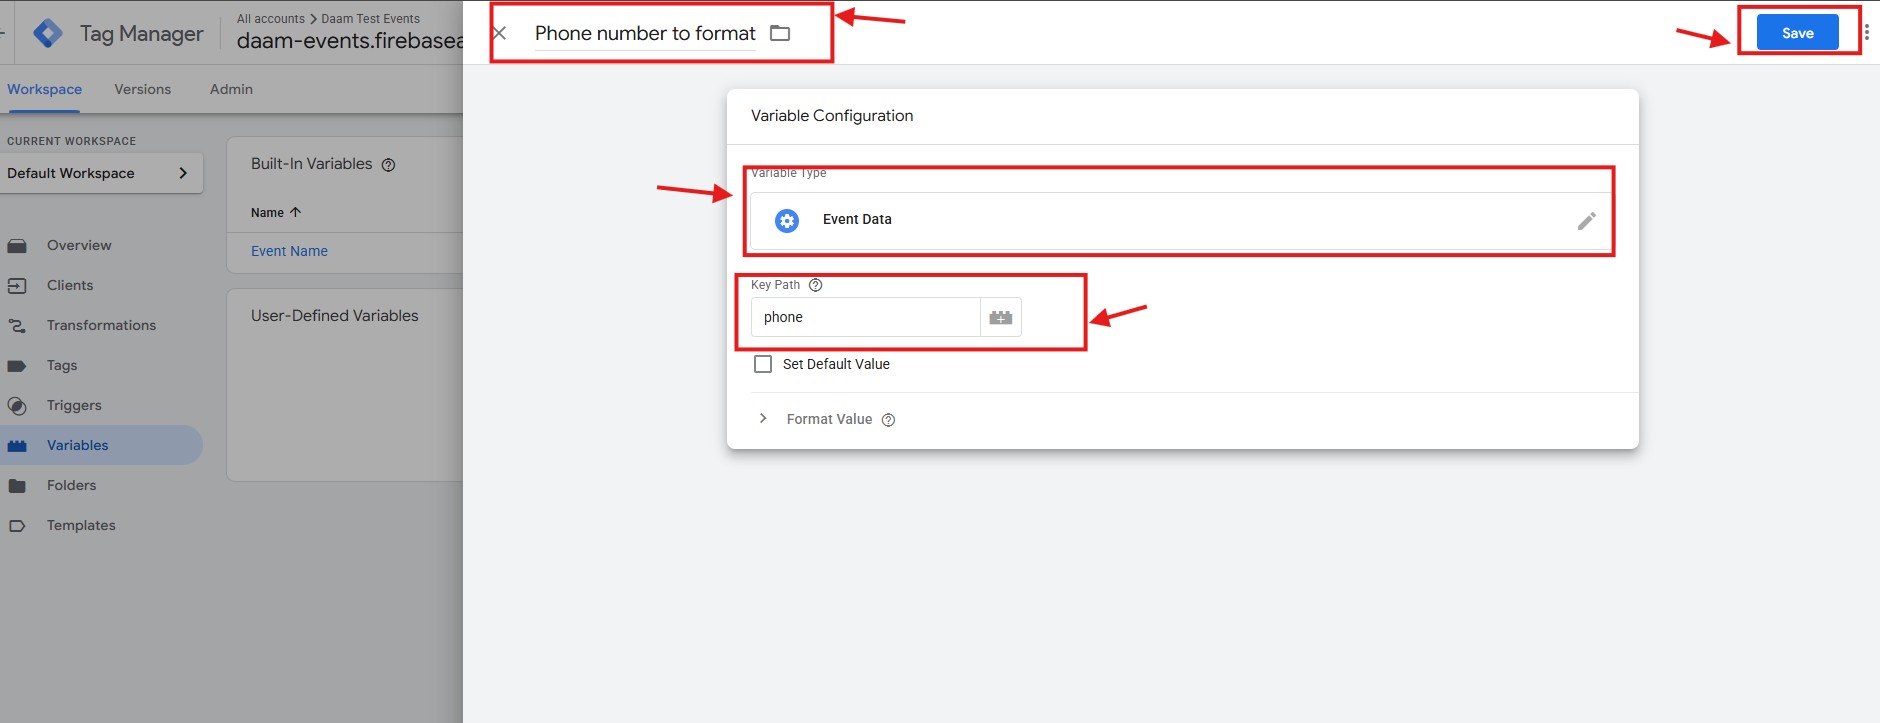
Create a variable to capture the raw phone number from your datalayer or server’s incoming request. Go to Variables Tab and click “New” button in User-Defined Variables section.
Give the variable a clear, relevant name (e.g., DL - Raw Phone Number). Select Event Data as the variable type. In the Key Path field, enter the specific property name from your Event Data Layer that contains the phone value. This ensures the normalizer knows exactly which piece of data to format. Click “Save” .
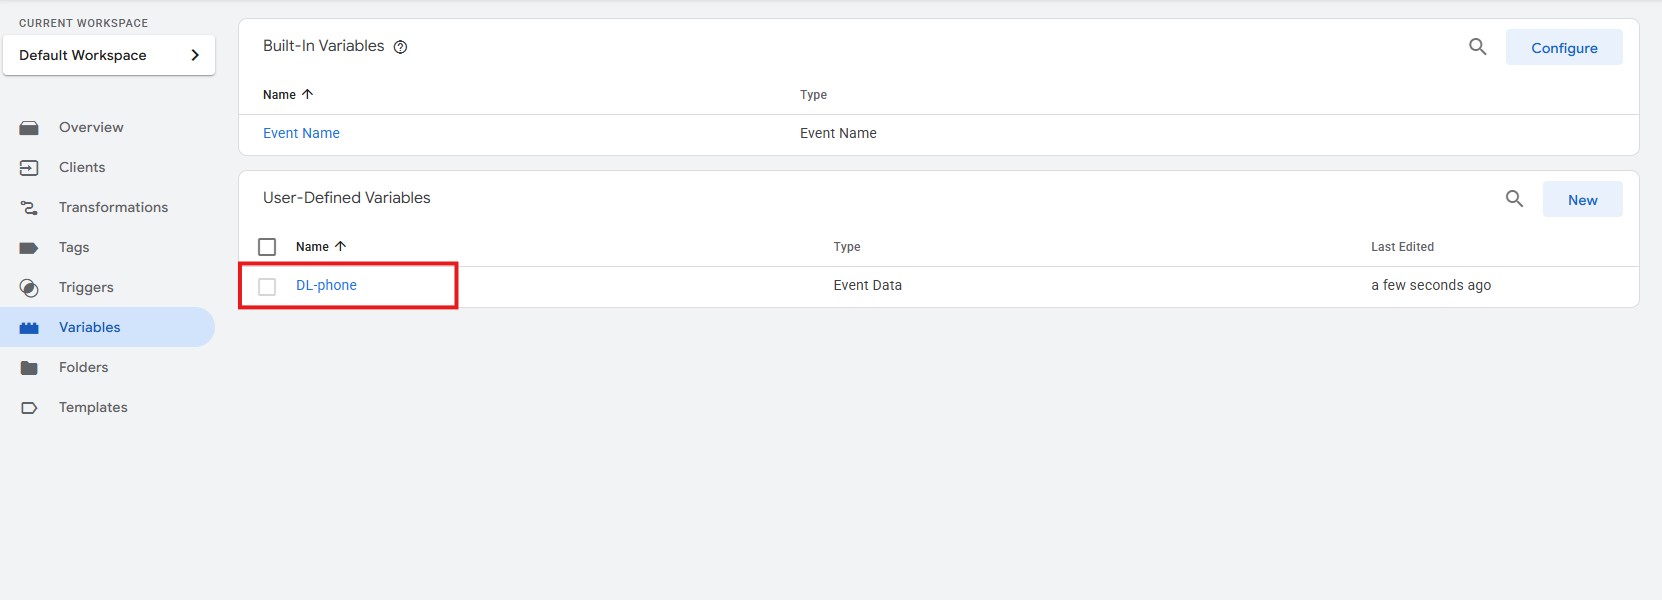
You can verify the added variable on the User-Defined Variables list.
Step 3: Create the Normalized Phone Variable
Now that you have captured the raw phone data, you must create a new variable to apply the cleaning and hashing logic. This step connects your incoming data source (the variable from Step 2) to your formatting and hashing logic.
Create a new variable. Name this variable descriptively, such as Normalized Hashed Phone . 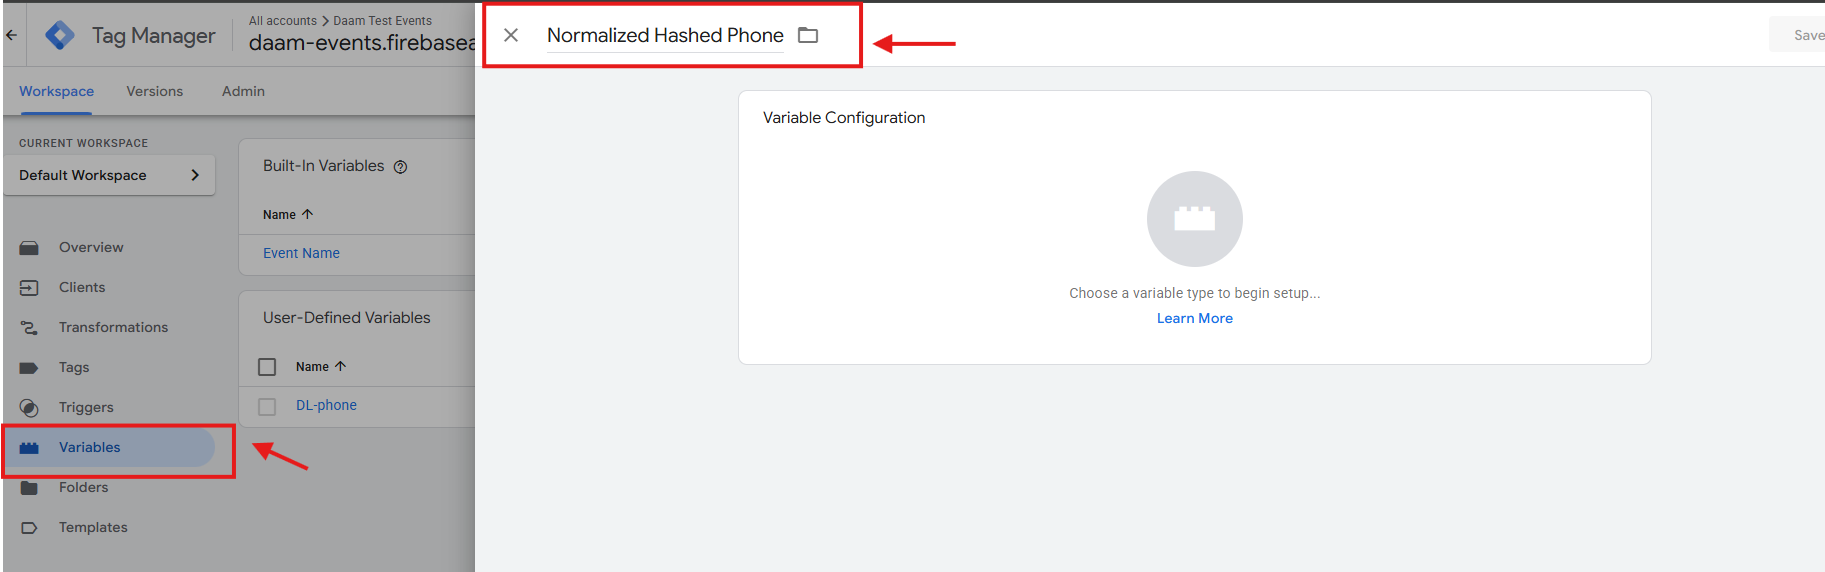
Click Variable Configuration and select the Phone/Mobile Normalizer & SHA256 Hasher template from the Custom Template List.
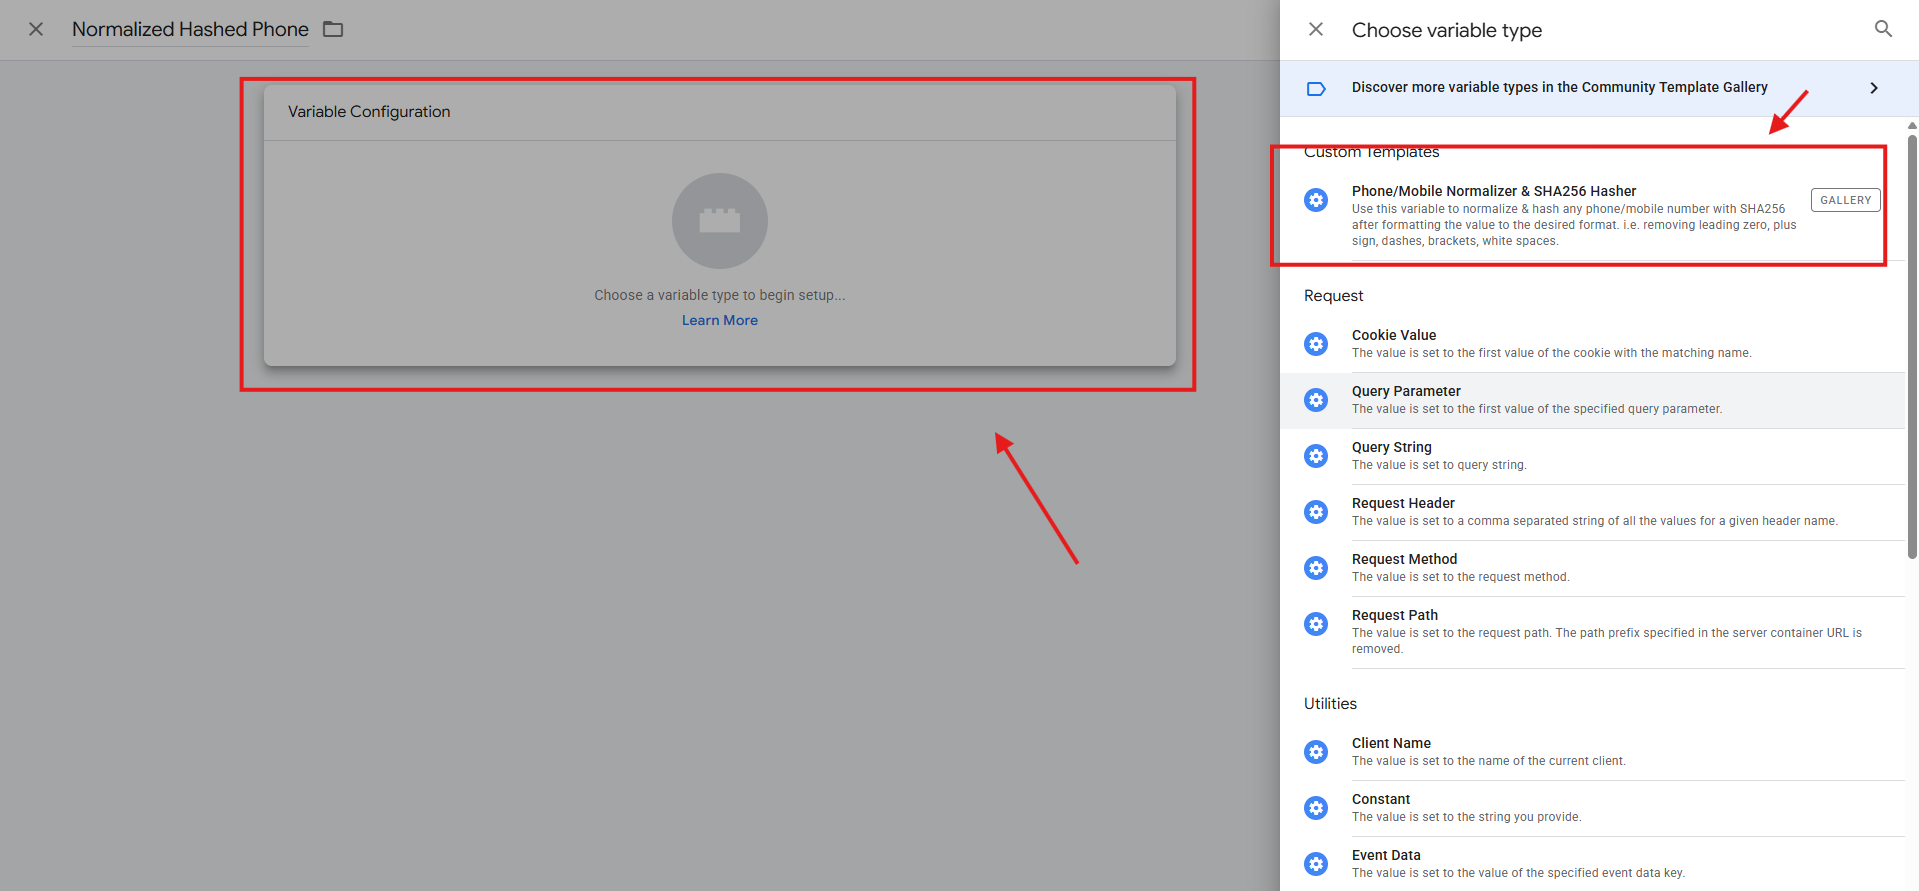
This is the most critical mapping. Click the Variable Icon (+) next to the Value to Hash field. Select the Event Data variable you created in Step 2 (e.g., ). Tick checkbox settings allow you to clean the data so it matches your strict formatting requirements. Each formatter was explained above.
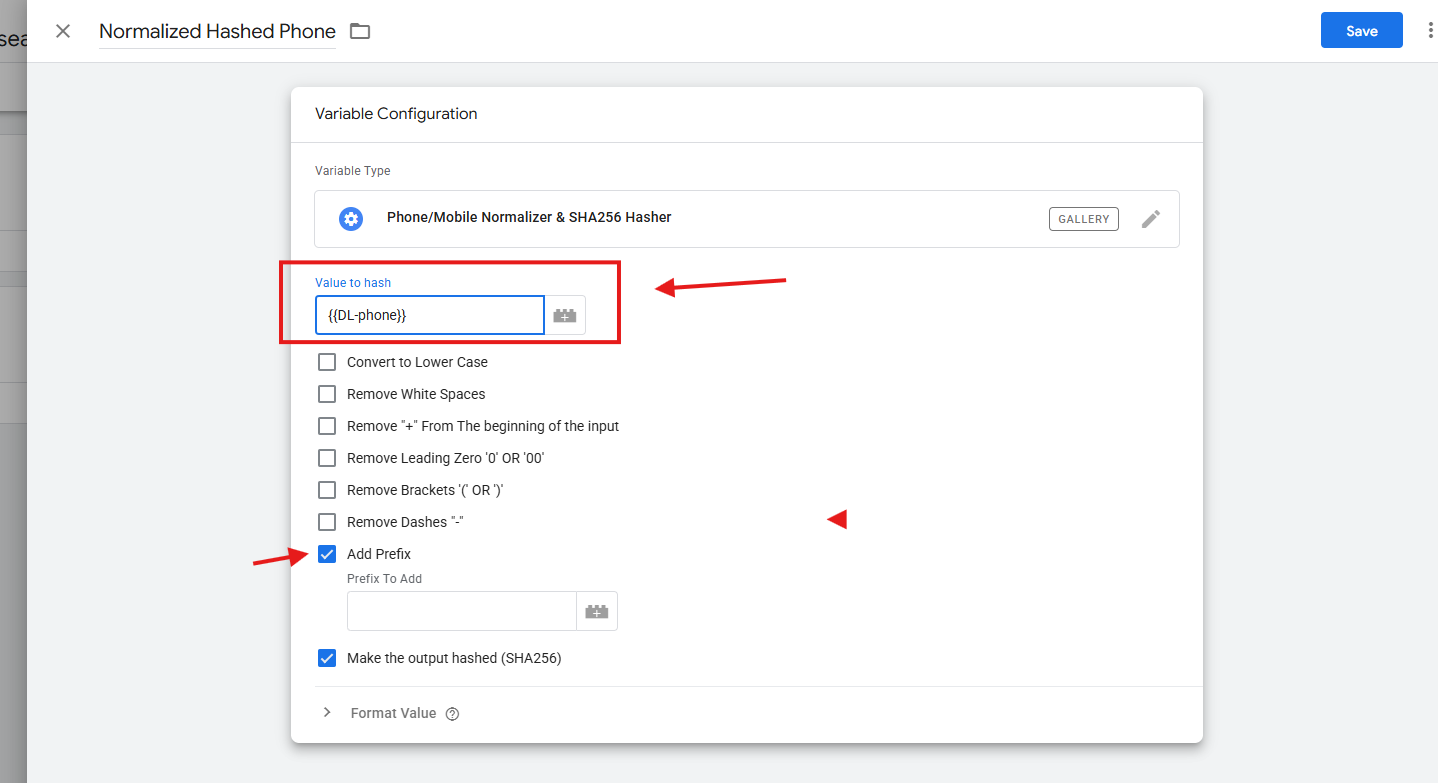
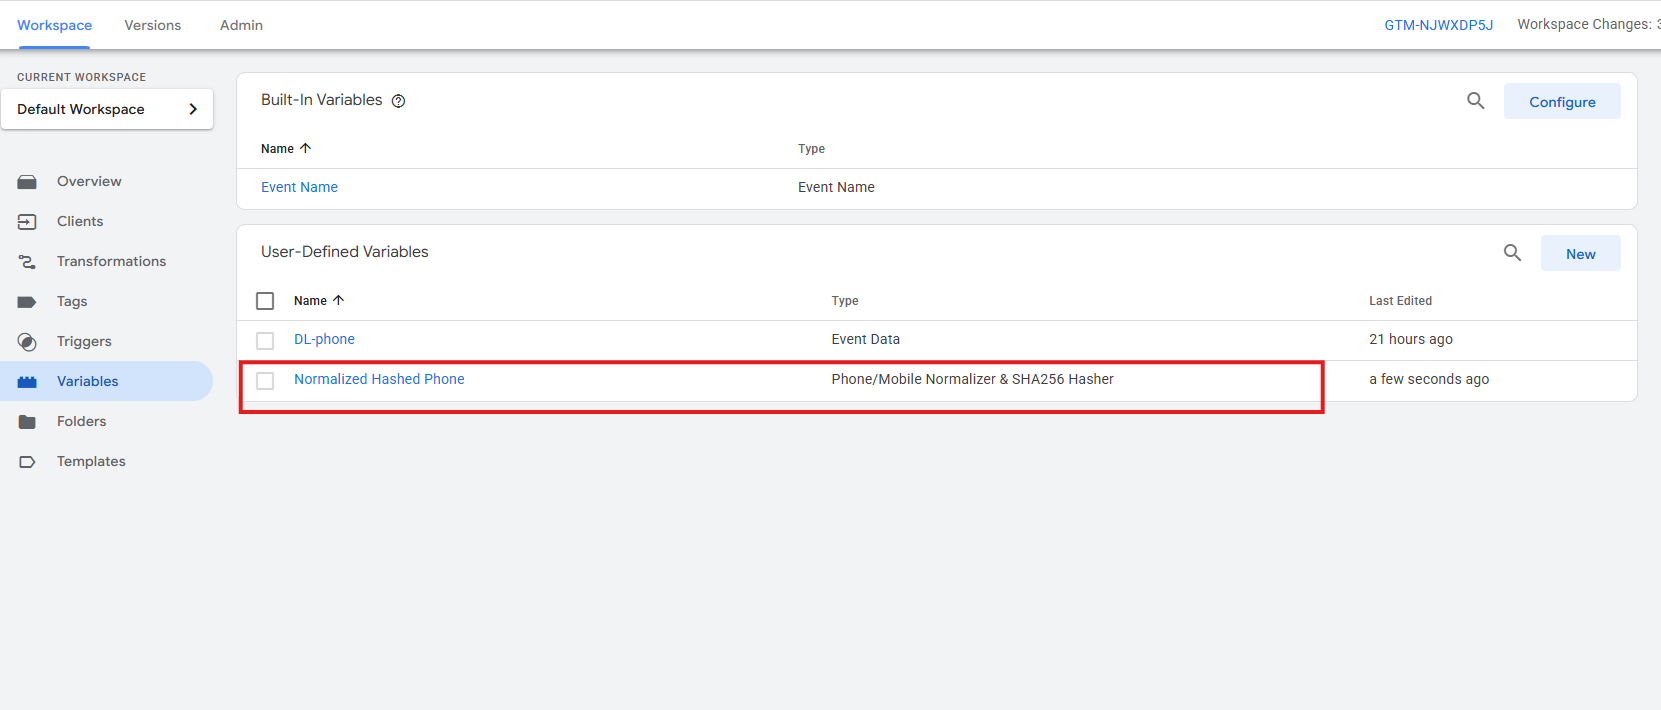
After saving, you can see the added variable on User-Defined Variables list. This configuration tells GTM to take the raw phone value and process it through the normalizer to generate the secure hash for your tags.
Step 4: Define the Event Trigger
We must tell GTM exactly when this action should happen. The trigger will execute or send the hashed phone number to Google’s servers.
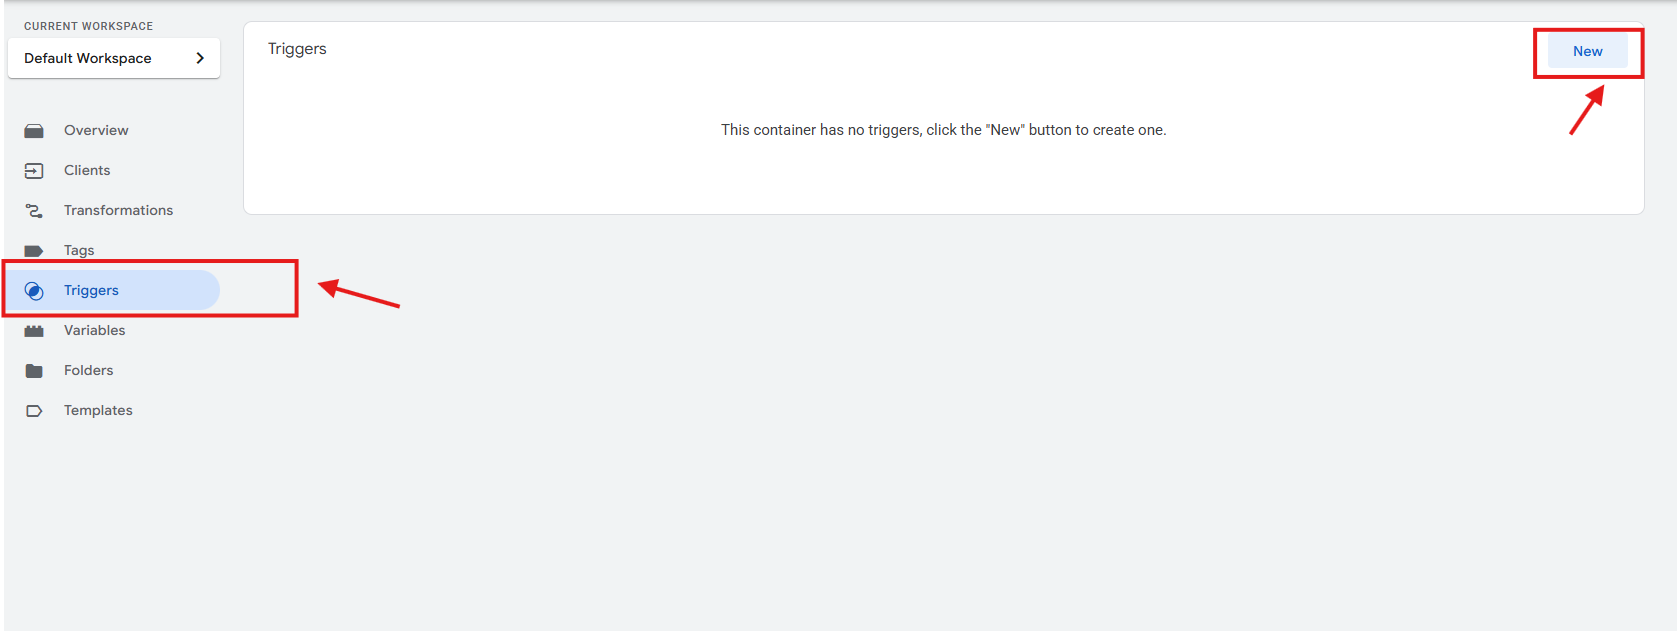
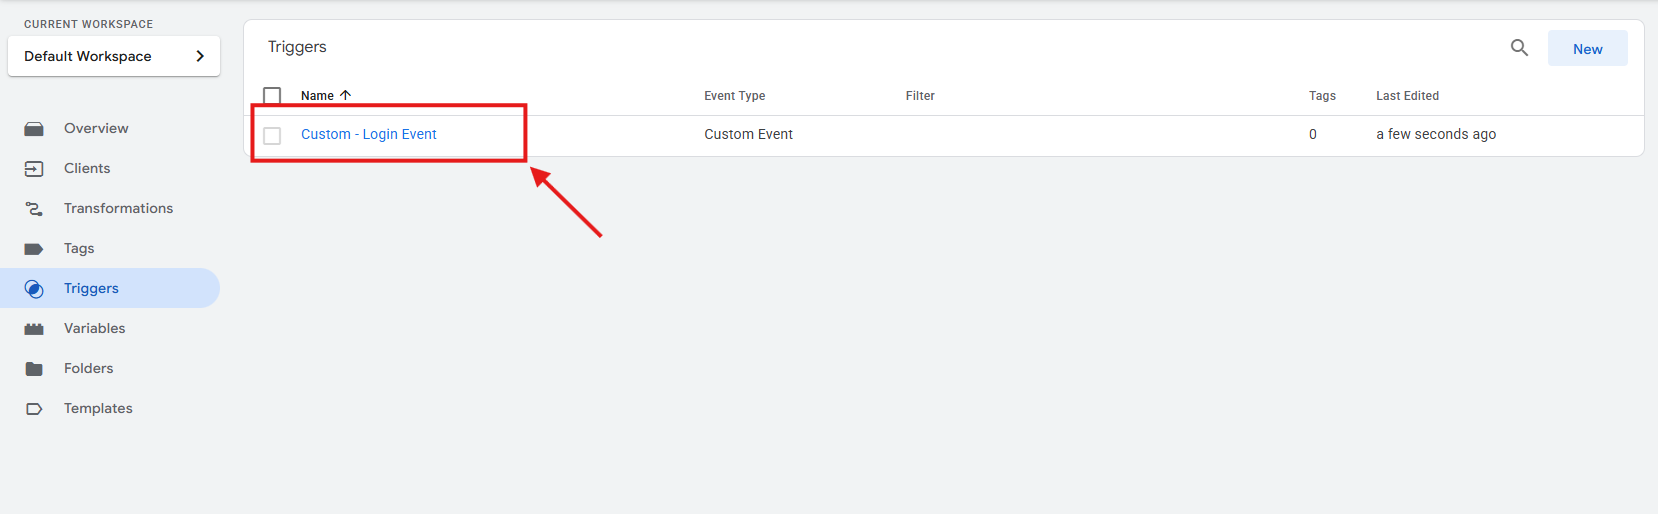
Create new Triggers. Go to Triggers tab and click “New” button on Triggers section.
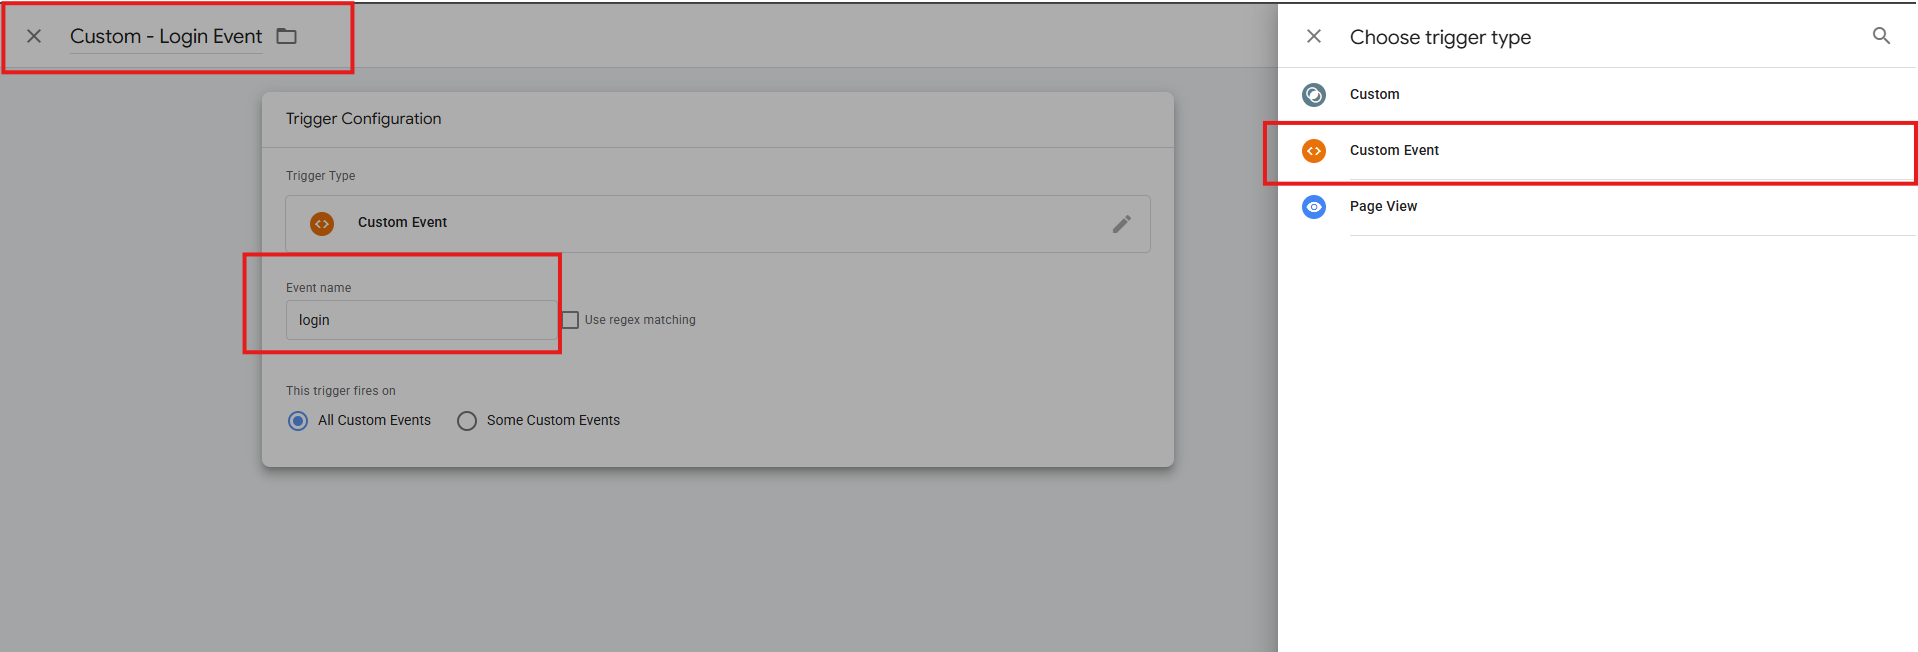
Name it clearly, such as Custom - Login Event. Open Trigger Type and Select Custom Event. Enter the exact event name sent by your website/app datalayer where the phone number to format is included (e.g., login).
After saving, the newly created trigger will appear on Triggers list.
Step 5: Mapping the Variable to your Tag
Once your normalized variable and trigger are ready, you must attach it to your tag to ensure the secure data is transmitted during events (like a login or purchase). This step ensures that tag receives the pseudonymized phone number as part of the event metadata.
Create new tag. Go to Tags tab and click “New” button on Tags section.
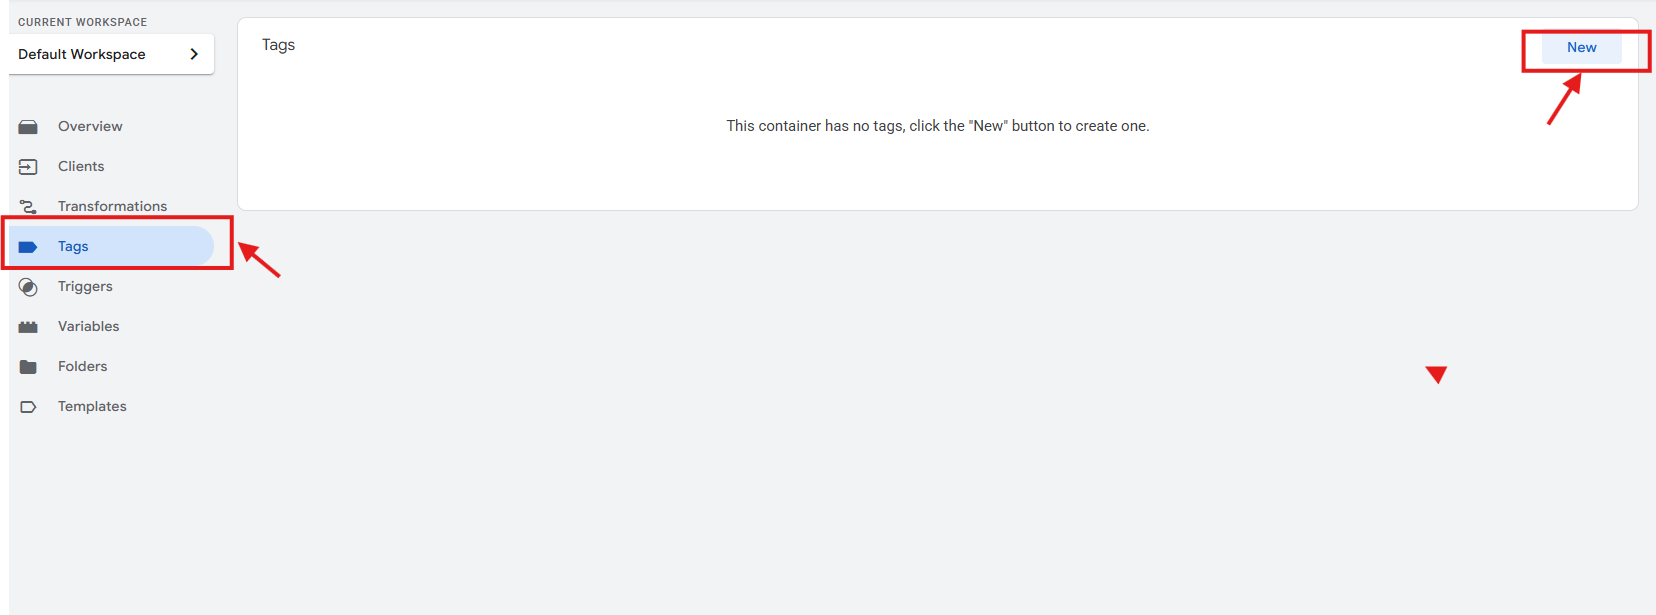
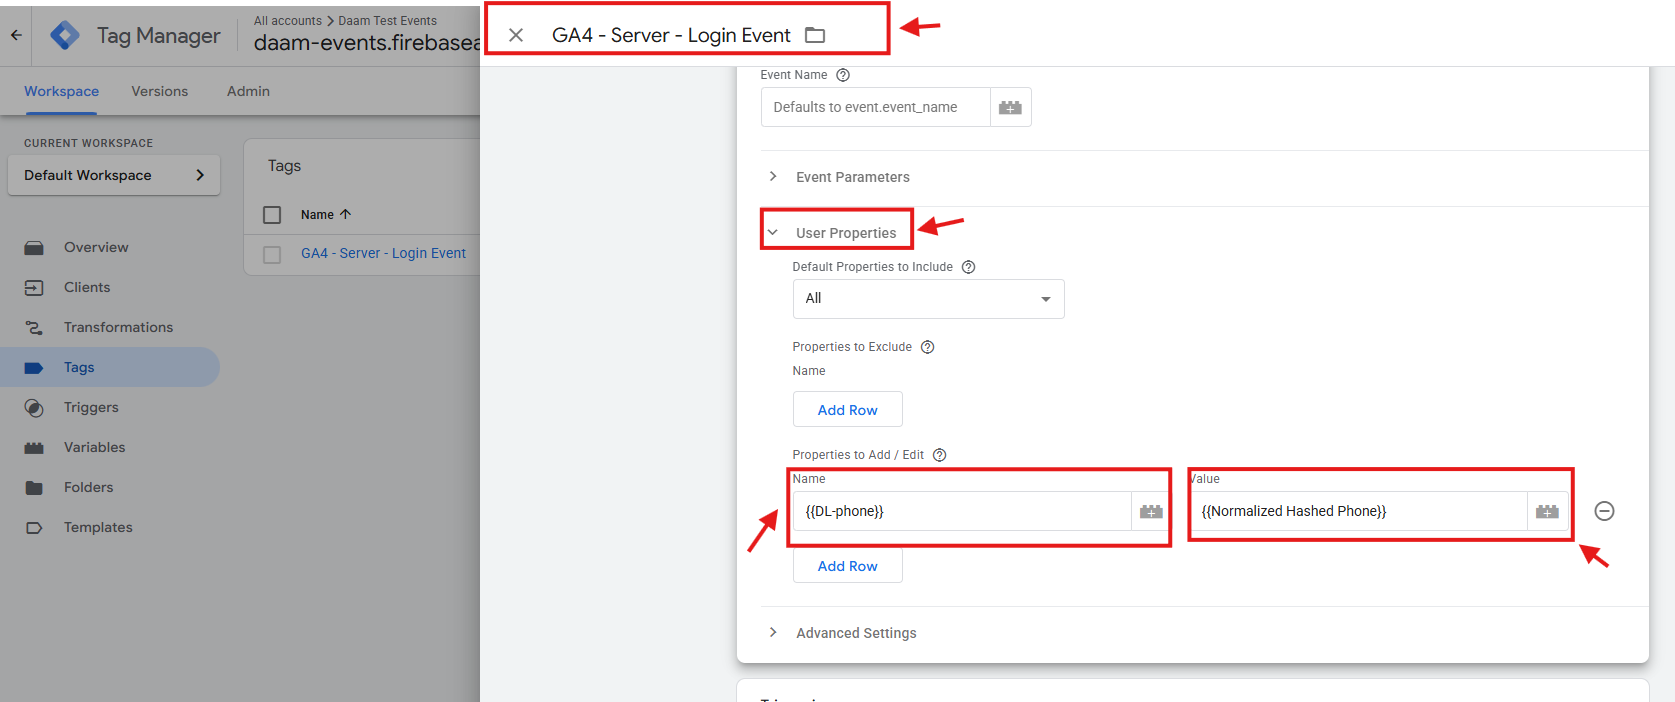
Give your tag a clear name (e.g., GA4 – Login Event). Open Tag Configuration: Select your Tag Type (eg. Google Analytics -> GA4 tag ).

Scroll down to the User Properties or Include User-Provided Data section. Click the Variable Icon (+) to add a new parameter. Map your Normalized Phone variable (created in Step 3) to the appropriate user data field.
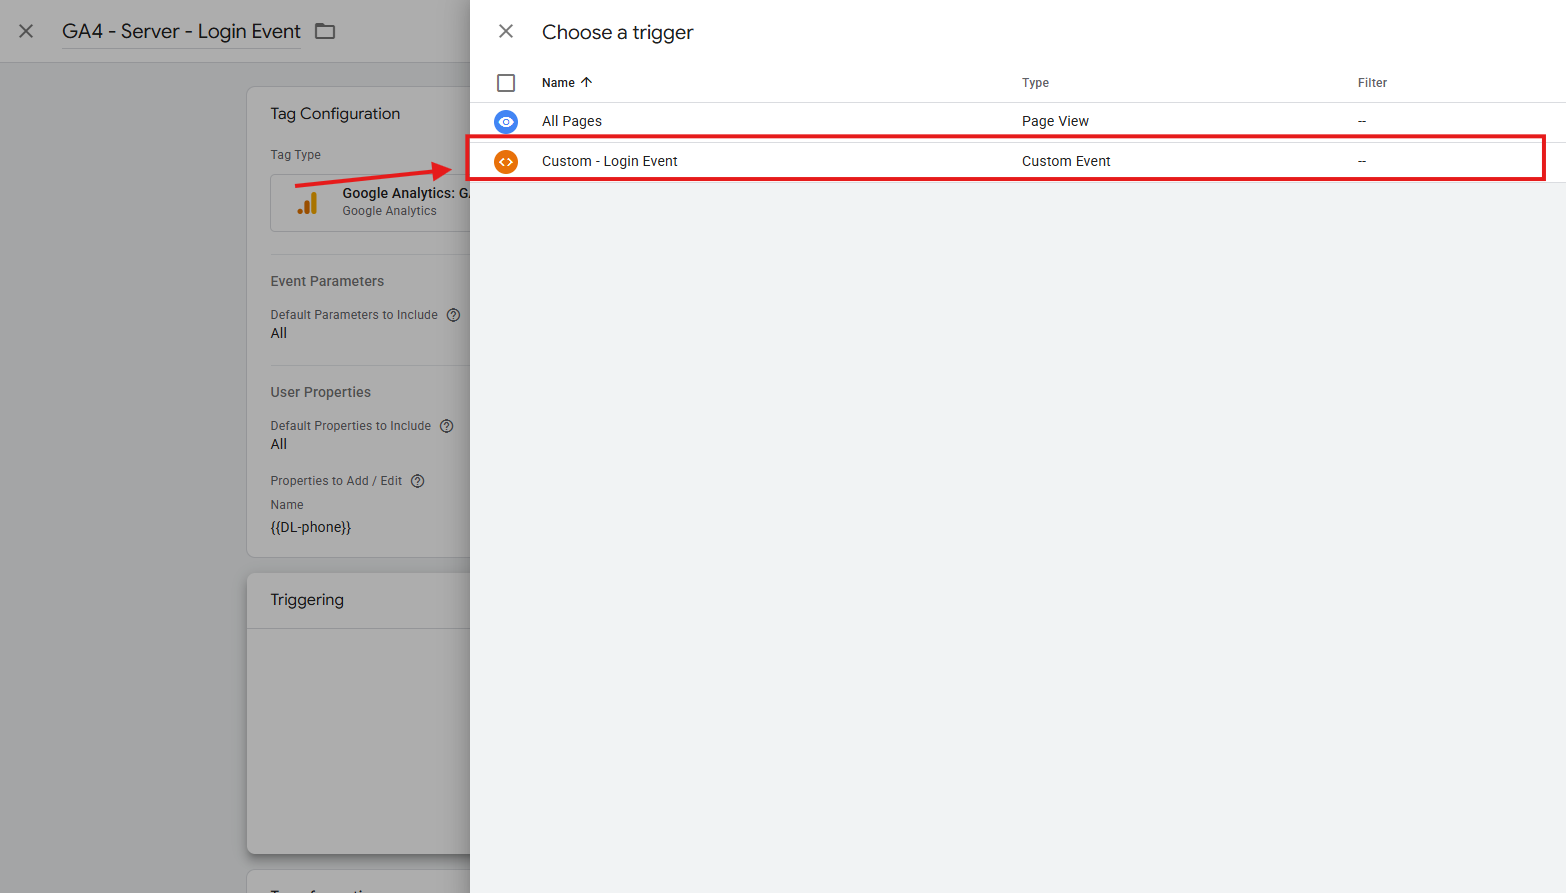
Scroll to the Triggering section and select the trigger you created in Step 4.
After saving, your newly created Tag will appear on Tags List. We are now ready for testing.

Testing & Validation (Preview Mode)
Before publishing your container, you must verify that the phone number is being correctly captured, normalized, and hashed.
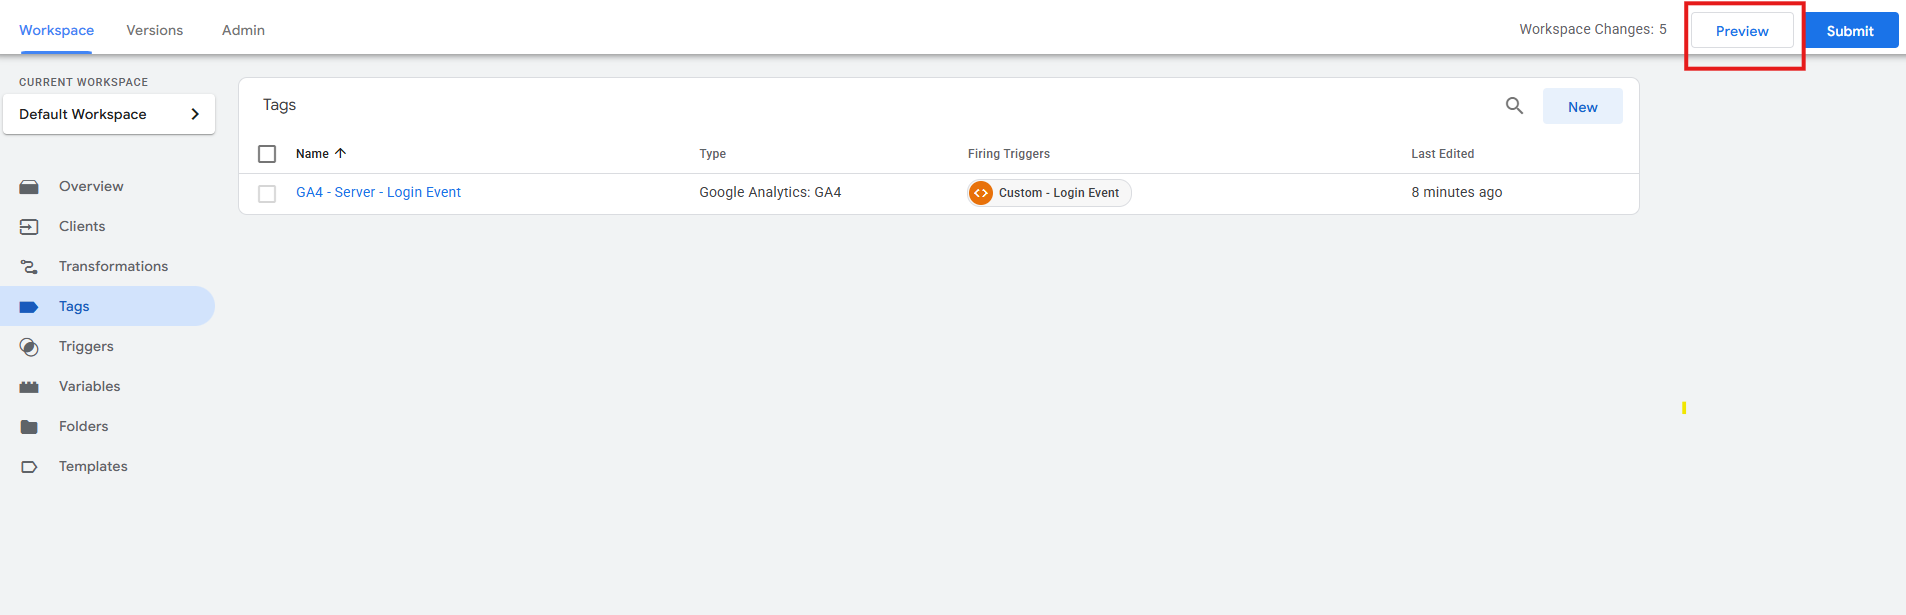
Click the Preview button in the top right corner of your GTM Server workspace.
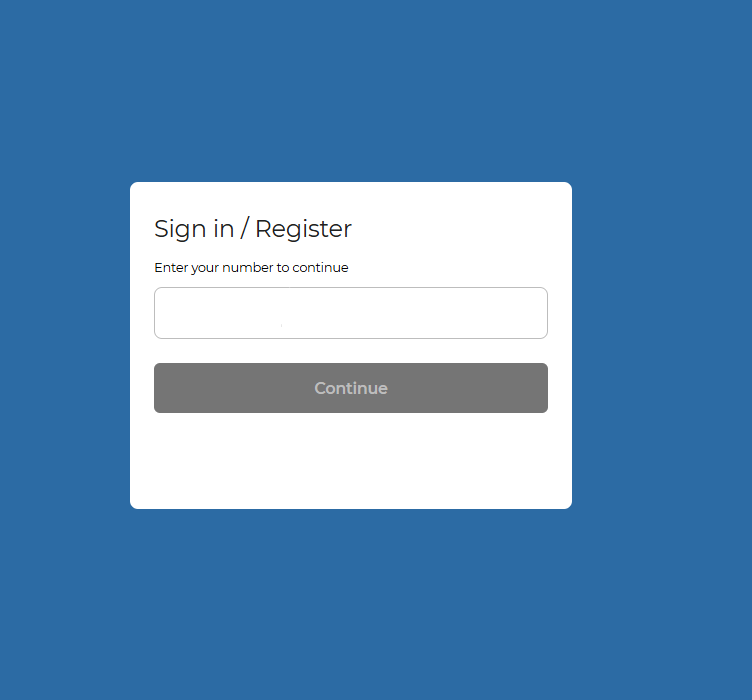
Go to your website or App and perform the action that triggers the event (e.g., log in or submit a form).
Option 1 : Click on the event in the sidebar, then click the Variables tab in the main window. Find your Normalized Phone variable. It should not show a plain-text phone number. Instead, it will show the formatted result based on the checklist you choosen on Step 3.3.
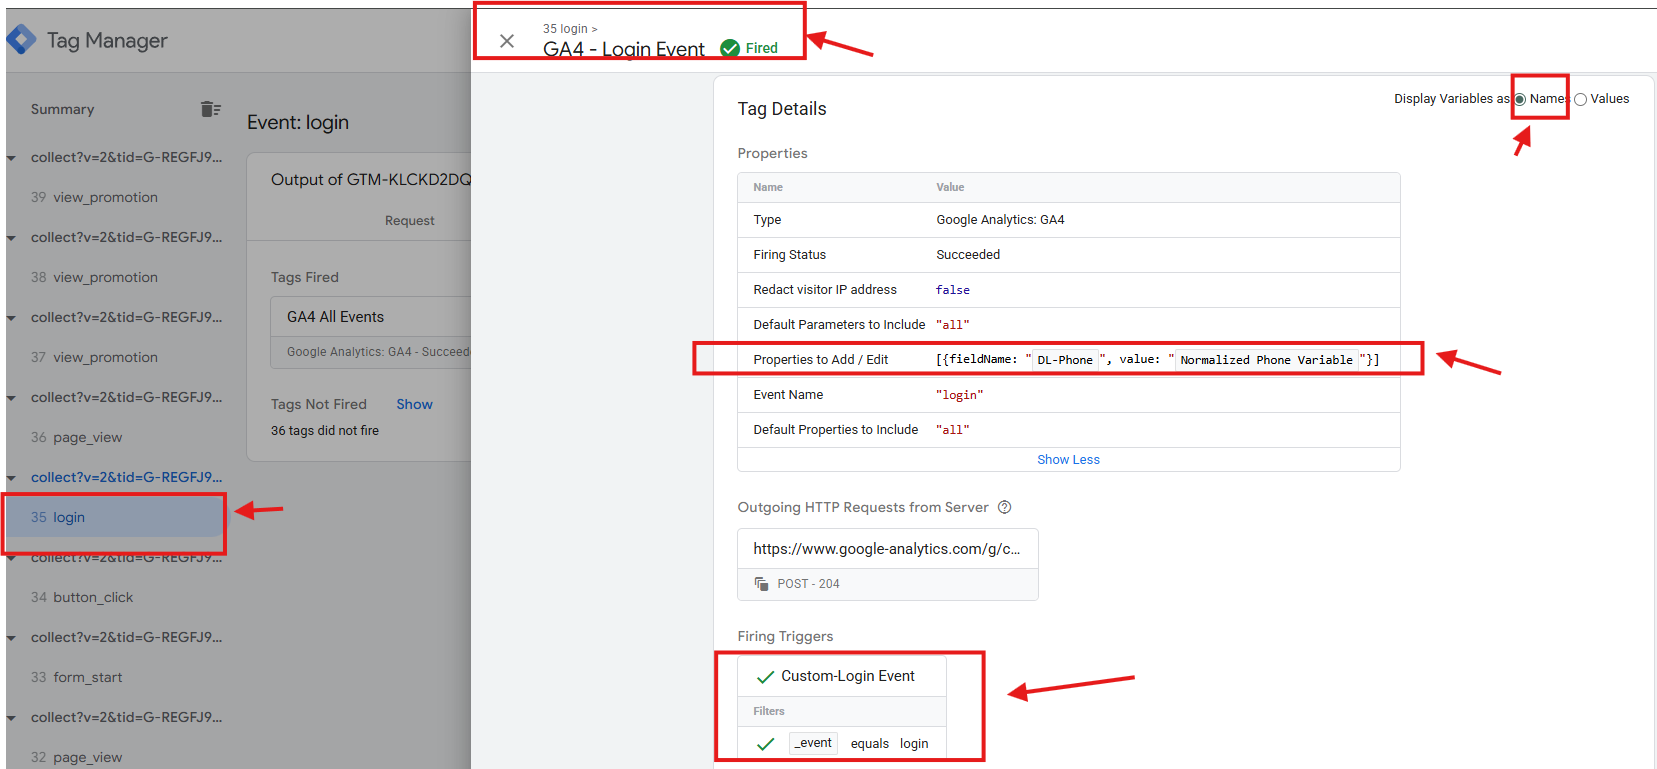
Option 2: Click on the event in the sidebar, then click the Tags tab in the main window. Click the tag name you created on Step 5.2 . You can check the status of tag ( Fired means success) and select “Values” as Display Variables to check the translation of the phone number.
Conclusion & Next Steps
Congratulations! You have successfully configured a privacy-first, server-side normalization pipeline for your phone data. By moving this logic to the server, you’ve not only improved your Data Match Quality for GA4 and Google Ads but also ensured that sensitive customer information is securely hashed before it ever reaches third-party platforms.
Final Success Checklist:
Need further assistance?
If you encounter any issues with specific data layer structures or advanced formatting requirements, feel free to reach out to our support team by sending us a message below or consult the official Google Tag Manager Server-Side documentation.
Targeting better attribution, one secure hash at a time.